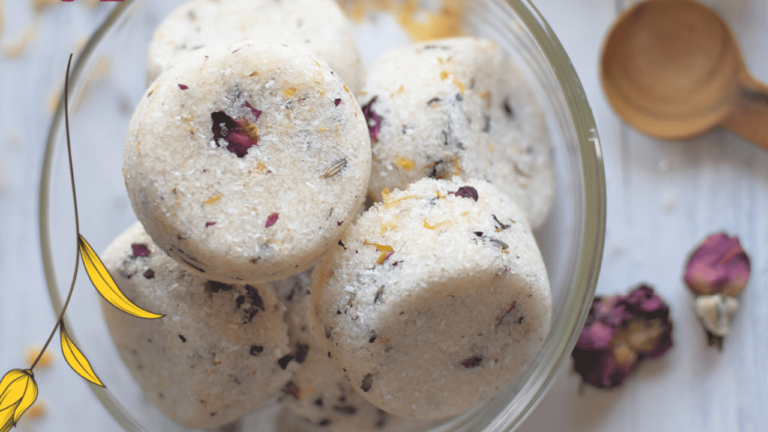
Lavender & Orange DIY Lotion Bars
This post may contain affiliate links. Please read my DISCLOSURE for more info.
Do you have dry hands or feet? Maybe even those stubborn cracked elbows? Well, look no further, homemade lotion to the rescue!
This is my second time making these lavender & orange DIY lotion bars and I have become a huge fan. Not only do they smell pleasant, due to the essential oils added, but the ingredients help make the skin super soft. Make sure to take a look at the many different benefits of coconut oil for the skin.
Now lavender is one of my favorite essential oils and adding sweet orange gives it that extra burst of relaxation. These DIY lotion bars aren’t only for hands and feet. Rub anywhere on your skin and the bar will then become the same consistency as a lotion.
They fit perfectly in a purse for easy on the go application. Or for when an evening massage comes into play. I usually apply onto my skin right before I go to bed for a good nights sleep.
The molds I prefer to use are silicone. I have noticed that the lotion is easier to remove once dry. I hope you guys enjoy them as much as I have!

Ingredients:
Directions:
Weigh the solid ingredients with a kitchen scale while they are in their hard form. I like to use ounces instead of cups because you can get a more accurate amount that way.
Melt the coconut oil, shea or cocoa butter, and beeswax on top of the stove using a double broiler. I used a saucepan and then a larger saucepan filled with water. It is easier to use a glass measuring cup inside a saucepan for easy pouring. I just didn’t have one at the time.
Beeswax is sold in different forms. In blocks or in little pellets. If you have a block beeswax I recommend grating, so it is faster to melt.
Once melted, take the pan away from the heated stove. Let cool for about five minutes then add in the lavender and sweet orange essential oils and stir.
Pour the melted ingredients into your silicone molds. Use the funnel or glass measuring cup with a spout. It can be difficult, but try not to over pour. You can see in the picture my pouring skills weren’t perfect, but I got better as I went along.
Let your lotion bars dry for about 12 hours. You can put in the freezer for a faster drying time, about 1-2 hours.
When fully dry carefully pop out the lotion from your silicone mold.
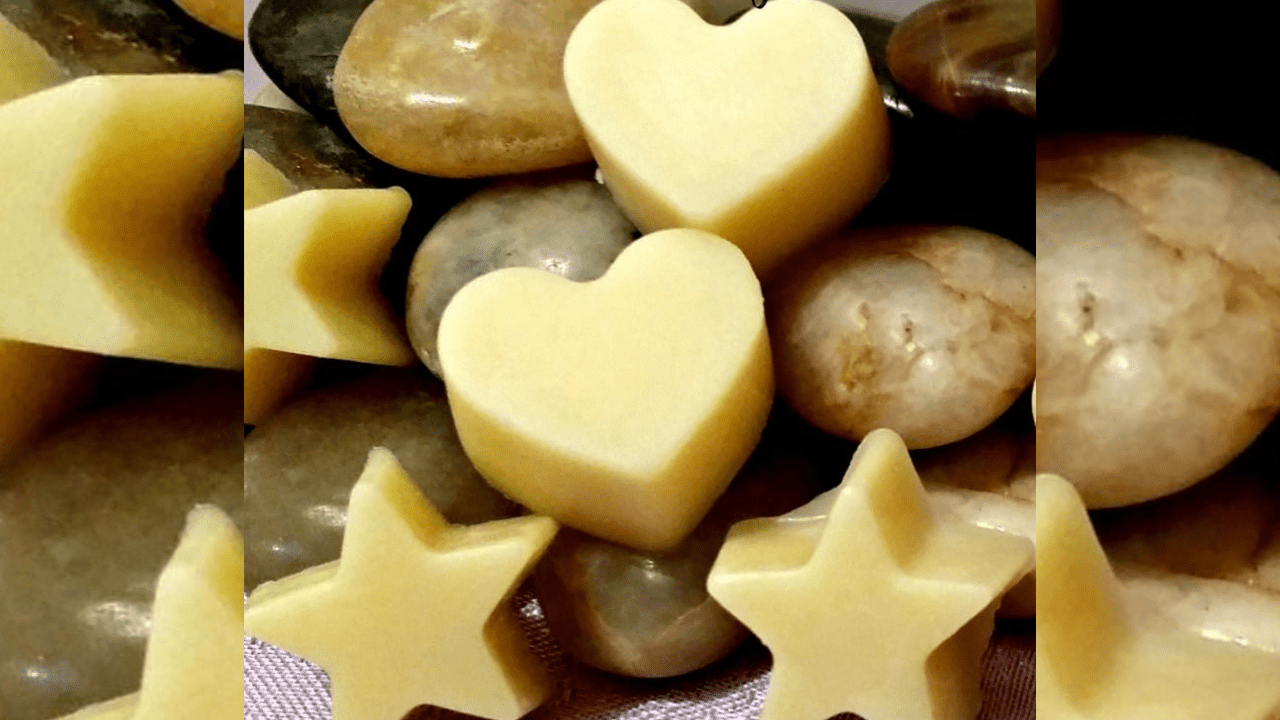
This filled two of my mold trays, the hearts and stars. Depending on how small or big your molds are you can usually guess how much of each ingredient to use. As long as you keep the same portions of coconut oil, shea or cocoa butter, and beeswax you will be good.
Since there is no water in this recipe your lavender & orange DIY lotion bars will have the same shelf life as the coconut oil you used.
Whether you are giving these out as gifts or just for yourself to enjoy, they look great stored in a glass jar of any size. If you try this recipe, I would love to hear from you! Feel free to comment in the box below sharing your experience while creating your relaxing DIY lotion bars or if you have any questions.
- 4 oz unrefined coconut oil
- 4 oz shea or cocoa butter
- 4 oz beeswax
- 14 drops lavender essential oil
- 10 drops sweet orange essential oil
- silicone mold
- Weigh the solid ingredients with a kitchen scale while they are in their hard form. I like to use ounces instead of cups because you can get a more accurate amount that way.
- Melt the coconut oil, shea or cocoa butter, and beeswax on top of the stove using a double broiler. I used a saucepan and then a larger saucepan filled with water.
- Beeswax is sold in different forms. In blocks or in little pellets. If you have a block beeswax I recommend grating, so it is faster to melt.
- Once melted, take the pan away from the heated stove. Let cool for about five minutes then add in the lavender and sweet orange essential oils and stir.
- Pour the melted ingredients into your silicone molds. Use the funnel or glass measuring cup with a spout.
- Let your lotion bars dry for about 12 hours. You can put in the freezer for a faster drying time, about 1-2 hours.
- When fully dry carefully pop out the lotion from your silicone mold.
Lavender & Orange DIY Lotion Bars
ByRinaNovember 15, 2022Reading Time: 5 minutes
This post may contain affiliate links. Please read my DISCLOSURE for more info.
Do you have dry hands or feet? Maybe even those stubborn cracked elbows? Well, look no further, homemade lotion to the rescue!
This is my second time making these lavender & orange DIY lotion bars and I have become a huge fan. Not only do they smell pleasant, due to the essential oils added, but the ingredients help make the skin super soft. Make sure to take a look at the many different benefits of coconut oil for the skin.
Now lavender is one of my favorite essential oils and adding sweet orange gives it that extra burst of relaxation. These DIY lotion bars aren’t only for hands and feet. Rub anywhere on your skin and the bar will then become the same consistency as a lotion.
They fit perfectly in a purse for easy on the go application. Or for when an evening massage comes into play. I usually apply onto my skin right before I go to bed for a good nights sleep.
The molds I prefer to use are silicone. I have noticed that the lotion is easier to remove once dry. I hope you guys enjoy them as much as I have!
Ingredients:
Directions:
Weigh the solid ingredients with a kitchen scale while they are in their hard form. I like to use ounces instead of cups because you can get a more accurate amount that way.
Melt the coconut oil, shea or cocoa butter, and beeswax on top of the stove using a double broiler. I used a saucepan and then a larger saucepan filled with water. It is easier to use a glass measuring cup inside a saucepan for easy pouring. I just didn’t have one at the time.
Beeswax is sold in different forms. In blocks or in little pellets. If you have a block beeswax I recommend grating, so it is faster to melt.
Once melted, take the pan away from the heated stove. Let cool for about five minutes then add in the lavender and sweet orange essential oils and stir.
Pour the melted ingredients into your silicone molds. Use the funnel or glass measuring cup with a spout. It can be difficult, but try not to over pour. You can see in the picture my pouring skills weren’t perfect, but I got better as I went along.
Let your lotion bars dry for about 12 hours. You can put in the freezer for a faster drying time, about 1-2 hours.
When fully dry carefully pop out the lotion from your silicone mold.
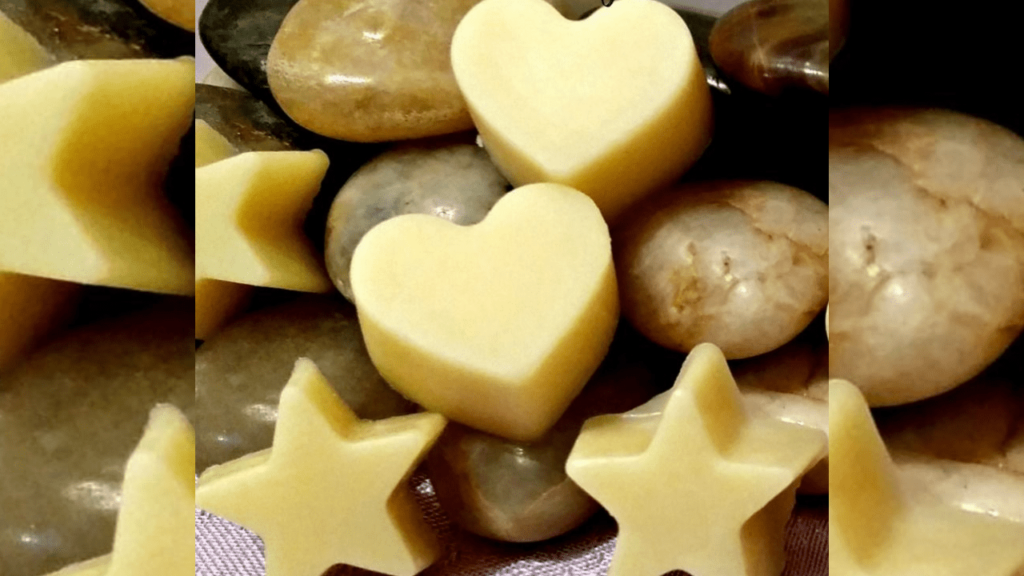
This filled two of my mold trays, the hearts and stars. Depending on how small or big your molds are you can usually guess how much of each ingredient to use. As long as you keep the same portions of coconut oil, shea or cocoa butter, and beeswax you will be good.
Since there is no water in this recipe your lavender & orange DIY lotion bars will have the same shelf life as the coconut oil you used.
Whether you are giving these out as gifts or just for yourself to enjoy, they look great stored in a glass jar of any size. If you try this recipe, I would love to hear from you! Feel free to comment in the box below sharing your experience while creating your relaxing DIY lotion bars or if you have any questions.
- 4 oz unrefined coconut oil
- 4 oz shea or cocoa butter
- 4 oz beeswax
- 14 drops lavender essential oil
- 10 drops sweet orange essential oil
- silicone mold
- Weigh the solid ingredients with a kitchen scale while they are in their hard form. I like to use ounces instead of cups because you can get a more accurate amount that way.
- Melt the coconut oil, shea or cocoa butter, and beeswax on top of the stove using a double broiler. I used a saucepan and then a larger saucepan filled with water.
- Beeswax is sold in different forms. In blocks or in little pellets. If you have a block beeswax I recommend grating, so it is faster to melt.
- Once melted, take the pan away from the heated stove. Let cool for about five minutes then add in the lavender and sweet orange essential oils and stir.
- Pour the melted ingredients into your silicone molds. Use the funnel or glass measuring cup with a spout.
- Let your lotion bars dry for about 12 hours. You can put in the freezer for a faster drying time, about 1-2 hours.
- When fully dry carefully pop out the lotion from your silicone mold.
ByRinaNovember 15, 2022Reading Time: 5 minutes
This post may contain affiliate links. Please read my DISCLOSURE for more info.
Do you have dry hands or feet? Maybe even those stubborn cracked elbows? Well, look no further, homemade lotion to the rescue!
This is my second time making these lavender & orange DIY lotion bars and I have become a huge fan. Not only do they smell pleasant, due to the essential oils added, but the ingredients help make the skin super soft. Make sure to take a look at the many different benefits of coconut oil for the skin.
Now lavender is one of my favorite essential oils and adding sweet orange gives it that extra burst of relaxation. These DIY lotion bars aren’t only for hands and feet. Rub anywhere on your skin and the bar will then become the same consistency as a lotion.
They fit perfectly in a purse for easy on the go application. Or for when an evening massage comes into play. I usually apply onto my skin right before I go to bed for a good nights sleep.
The molds I prefer to use are silicone. I have noticed that the lotion is easier to remove once dry. I hope you guys enjoy them as much as I have!
Ingredients:
Directions:
Weigh the solid ingredients with a kitchen scale while they are in their hard form. I like to use ounces instead of cups because you can get a more accurate amount that way.
Melt the coconut oil, shea or cocoa butter, and beeswax on top of the stove using a double broiler. I used a saucepan and then a larger saucepan filled with water. It is easier to use a glass measuring cup inside a saucepan for easy pouring. I just didn’t have one at the time.
Beeswax is sold in different forms. In blocks or in little pellets. If you have a block beeswax I recommend grating, so it is faster to melt.
Once melted, take the pan away from the heated stove. Let cool for about five minutes then add in the lavender and sweet orange essential oils and stir.
Pour the melted ingredients into your silicone molds. Use the funnel or glass measuring cup with a spout. It can be difficult, but try not to over pour. You can see in the picture my pouring skills weren’t perfect, but I got better as I went along.
Let your lotion bars dry for about 12 hours. You can put in the freezer for a faster drying time, about 1-2 hours.
When fully dry carefully pop out the lotion from your silicone mold.
This filled two of my mold trays, the hearts and stars. Depending on how small or big your molds are you can usually guess how much of each ingredient to use. As long as you keep the same portions of coconut oil, shea or cocoa butter, and beeswax you will be good.
Since there is no water in this recipe your lavender & orange DIY lotion bars will have the same shelf life as the coconut oil you used.
Whether you are giving these out as gifts or just for yourself to enjoy, they look great stored in a glass jar of any size. If you try this recipe, I would love to hear from you! Feel free to comment in the box below sharing your experience while creating your relaxing DIY lotion bars or if you have any questions.
- 4 oz unrefined coconut oil
- 4 oz shea or cocoa butter
- 4 oz beeswax
- 14 drops lavender essential oil
- 10 drops sweet orange essential oil
- silicone mold
- Weigh the solid ingredients with a kitchen scale while they are in their hard form. I like to use ounces instead of cups because you can get a more accurate amount that way.
- Melt the coconut oil, shea or cocoa butter, and beeswax on top of the stove using a double broiler. I used a saucepan and then a larger saucepan filled with water.
- Beeswax is sold in different forms. In blocks or in little pellets. If you have a block beeswax I recommend grating, so it is faster to melt.
- Once melted, take the pan away from the heated stove. Let cool for about five minutes then add in the lavender and sweet orange essential oils and stir.
- Pour the melted ingredients into your silicone molds. Use the funnel or glass measuring cup with a spout.
- Let your lotion bars dry for about 12 hours. You can put in the freezer for a faster drying time, about 1-2 hours.
- When fully dry carefully pop out the lotion from your silicone mold.
